Cooking Guides & Tips

How-To: Tadka for Bengali Five Spice
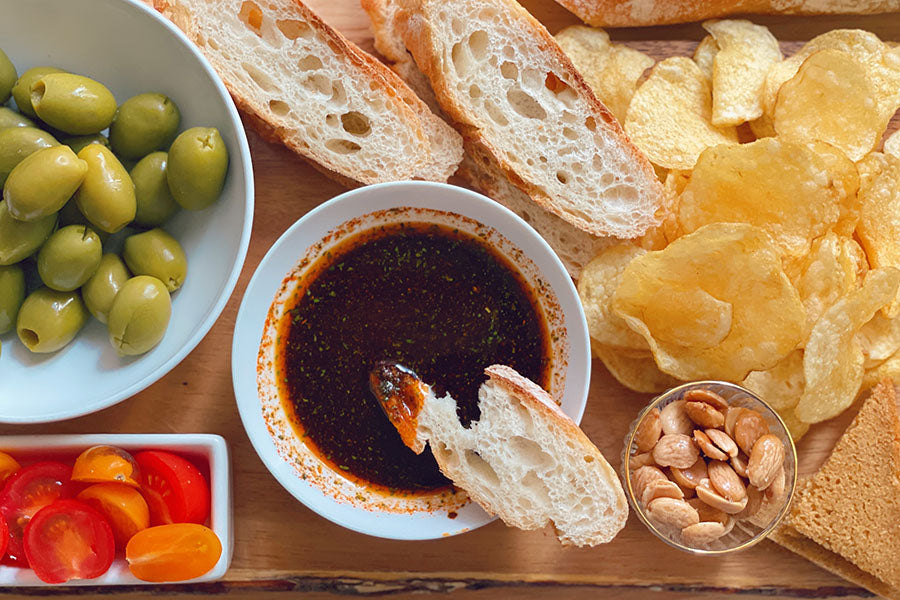
If you've ever seen a recipe that starts with "bloom the spices in hot oil," you've met a tadka. It sounds fancy. It isn't. It's one of the most useful techniques in the kitchen, and once it clicks, it becomes a skill you'll reach for instinctively. What's a tadka? A tadka (also called a tarka or chhaunk) is a foundational technique in South Asian cooking where whole, crushed, or ground spices are bloomed in hot oil or ghee, then poured directly over a dish to finish it. The heat extracts and transforms the flavors of each spice, pulling them into the oil and turning them fragrant and deep. Our Bengali Five Spice — five whole seeds, also known as Panch Phoron — is one of the classic blends for exactly this technique. Here's how: Heat a small pan over medium heat with a generous pour of oil or ghee. Watch for the shimmer — when the oil moves like water and catches the light, you're ready. Add a generous spoonful of Bengali Five Spice and stir gently but constantly. Wait for the sputter. When the seeds are dancing and fragrant, about 30 to 60 seconds, you're done. Pour the whole thing, oil and seeds, directly over your dish. What to put it on: Dal is the classic starting point. But a tadka will also transform potato dishes, chutneys, roasted vegetables, or a sturdy salad — think cauliflower with chickpeas, dressed warm or at room temperature. Anything that wants a nutty, earthy, aromatic note. Which turns out to be a lot of things. Try it this week. The whole technique takes about two minutes. Bengali Five Spice is part of our Spring Vault collection — available through May. Shop Bengali Five Spice
Learn more
Vanilla Cake You'll Remember
Valentine's Day doesn't have to be about romance. For me, it was a treasure hunt. Every Valentine's Day from the time I was very young, my mom would wake up early and hide clues around the house. Rhyming riddles that led from the bookshelf to the kitchen drawer to the woodpile. One year, each clue came with a puzzle piece and we had to put the whole thing together to find the final hiding spot. The prize was always the same: vanilla cake with cherry buttercream frosting, sometimes as cupcakes, sometimes as a whole cake. It was the kind of childhood tradition that made the world feel like magic. I think about that now as an adult—how much effort and love went into making that tradition happen every single year. The planning, the early morning baking, the care in every hand-written rhyme. It's one of the best memories I have of what love looks like. And the taste of this cake brings me back to that feeling every time. I'd like to share this special recipe with you. It's simple, it's delicious, and it works just as well as a layer cake or cupcakes. Make it for someone you love. Vanilla Cake You'll Remember Serves 10+ | 350°F Cake 1 cup butter 1½ cups sugar ½ teaspoon salt 1½ teaspoons vanilla 4 eggs 3 cups cake flour 3 teaspoons baking powder 1 cup milk Cream butter, 1½ cups of the sugar, salt, and vanilla well. Add eggs one at a time and beat well. Sift the flour and baking powder together several times. Add the dry mixture with the milk in alternating portions to the creamed blend. Beat smooth. Pour batter into 2 9-inch layer pans and bake about 35 minutes. Cool on racks. For cupcakes: Bake about 25 minutes. Frosting (for a 2-layer cake) ½ cup soft butter 3 cups confectioner's sugar ¼ teaspoon salt 3 tablespoons cream 1½ teaspoon vanilla Cream butter until fluffy. Gradually beat in confectioner's sugar, salt, cream, and vanilla. For cherry frosting: Add cherry flavoring to taste. I love adding different spice blends to this recipe depending on the occasion. My favorites are Advieh for warm, floral notes, and Kashmiri Garam Masala for intense, deeply spiced flavors. To add a spice blend, stir a tablespoon into the batter along with the flour mixture, and leave the frosting plain.
Learn more
Perfect Pepper: Understanding Grind Size
Does the coarseness of the pepper really make a difference? While pepper is still pepper no matter how you grind it, there are some interesting nuances to how grind size can affect your cooking. Let’s look at a few examples. Fine Grind When pepper is ground finely it covers more area and tastes hotter. If you’re looking to get maximum spiciness out of your peppercorns go for a fine grind and a lot of it. Finely ground pepper also dissolves the most easily into a dish, so if you want peppercorn flavor with no noticeable texture — say in a creamy soup or smooth mashed potatoes — a fine grind is your best option. Medium Grind Also known as “Table Grind,” this is the size you’re most likely to find in pepper shakers or grinders on a restaurant table. There's a good reason for this. A medium grind is the best choice for adding to food at the table. It has a little texture and crunch, a medium heat level, and is all around great for use as a condiment. Coarse Grind While fine ground pepper brings even, intense heat, coarse ground brings the fireworks. Large chunky pieces create bursts of texture and intense peppercorn flavor that make dishes exciting and engaging. A coarse grind works great for steaks, salad dressings, and pasta dishes like cacio e pepe. A coarse grind is also ideal for adding as a decorative finishing sprinkle. Whole Peppercorns Whole peppercorns are best suited for infusing their flavors over a long period of time. Add them to soups, stews, broths, and pickle brines, but remember with a longer infusion they can really pack a punch, so start with just a few.
Learn more
Perfect Crispy Wings from the Oven
If you want crispy baked wings without frying, baking powder is the trick. Use aluminum free baking powder, not baking soda. It raises the pH of the skin, helps the fat render, and gives you that golden, crackly finish. For 2 pounds of chicken wings, use 1 to 2 tablespoons of baking powder and 1 teaspoon kosher salt. Add 2 tablespoons total of dry spices, and set aside another tablespoon or so of those spices to toss on after the wings are finished. If you’re planning to sauce the wings, you can still coat them lightly with just salt and baking powder to get that crispy skin. To turn dry spices into a sauce, gently warm the spices in a bit of fat like butter or oil for 30 to 60 seconds, just until fragrant. This wakes up the spices and keeps the flavors bold. Finish with a splash of acid like vinegar or lemon and a touch of sweetness if you like, then toss the hot wings right away so the sauce clings and shines.
Learn more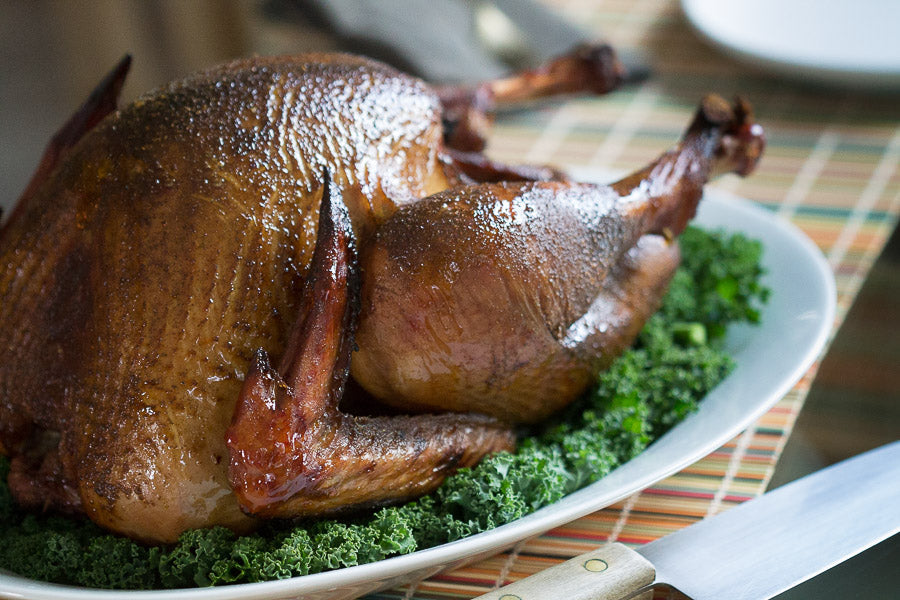
Thanksgiving Turkey Rubs and Brines
Thanksgiving might be weeks away, but your turkey deserves some early love. Choosing the right spices now isn’t just smart — it’s strategic.The right blend can turn a good bird into a great one, and planning ahead means you’ll actually have time to relax and enjoy the big day. Whether you’re a traditionalist, a flavor explorer, or somewhere in between, here are the spices that’ll make for an unforgettable turkey. Poultry Rub This classic blend is built on a robust foundation of Sage, Thyme, Marjoram, and Rosemary, with refreshing touches of Black Pepper, Garlic, Onion, and Celery. The best choice for familiar flavors with a fresh, vibrant twist. Northwest Forest Brine Northwest Forest Brine leads with Juniper, imparting distinctive pine and citrus notes, beautifully complemented by Fennel, Green Pepper, and Allspice. Designed to be used as a wet or dry brine, it infuses rich, aromatic flavor into your bird. Fin & Feather BBQ Rub Make your turkey the talk of the table with Fin & Feather. It balances classic barbecue rub flavors (Paprika, Black Pepper, and Garlic) with traditional poultry spices (Onion, Lemon Peel, Sage, and Marjoram). Ras El Hanout Craving something unexpected? Ras El Hanout is just the ticket. This 24-ingredient blend layers your turkey with fragrant warmth, bold spice, and a touch of sweetness, creating a bird that’s rich, complex, and totally unique. Turkey Tips: Spice With Confidence Plan Ahead: Rub your turkey with spices a few hours before roasting — or better yet, the night before — so the flavors really sink in. Early prep = stress-free holiday. Get Under the Skin: Gently lift the skin over the breast and rub in some seasoning. That’s where the magic happens. Don’t Skimp: And go for even coverage — legs, cavity, wings — a little love everywhere ensures every bite sings. Keep It Dry: Pat the bird dry before rubbing. Moisture is the enemy of crispy, flavorful skin. Sneak a Taste: Cooking a turkey is serious business, but sampling a tiny nibble of seasoned meat while it cooks? Totally allowed. Consider it quality control. Curious about brining? Stay tuned — next week, we’ll talk more about brines. Shop our collection of rubs and brines.
Learn more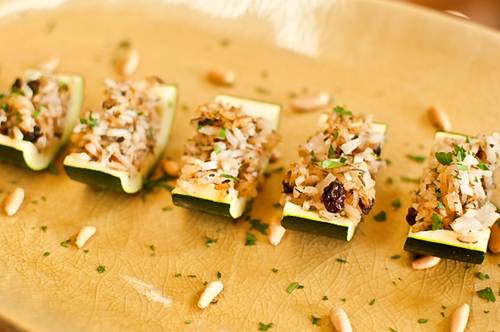
How to Use Up All That Zucchini
Happy "National Sneak Some Zucchini Onto Your Neighbor’s Porch" Day! It’s officially peak zucchini season. For home gardeners, it’s both a blessing and a struggle — the bumper crop can quickly take over your yard, fridge, kitchen counter … your entire life. And when coworkers start avoiding eye contact as you arrive with a tote bag, take the hint: they, too, have hit maximum squash saturation. You can stick with the porch-sneaking tradition, or follow our lead. Here’s how we’re happily eating our way through the surplus. El Greco Zucchini Cheddar Muffins A perfect make-ahead breakfast for busy mornings or lazy weekends alike. Zucchini keeps them tender and moist, while our El Greco blend adds a bold, herby punch that plays perfectly with the cheddar. Get the recipe. Kofte Spice Stuffed Zucchini Make it a snack, make it a side — just make it. This Turkish-inspired dish looks impressive but comes together easily, thanks to our Kofte Spice. The mix of peppermint and savory adds a refreshing twist for warm summer days. Get the recipe. Summer Vegetable Pasta Bake For summer gatherings, this veggie-packed pasta bake is an easy way to feed a crowd — and make quick use of all that zucchini alongside the burgers and brats. Try it with our Fines Herbes or Tuscan Rosemary Salt. Get the recipe.
Learn more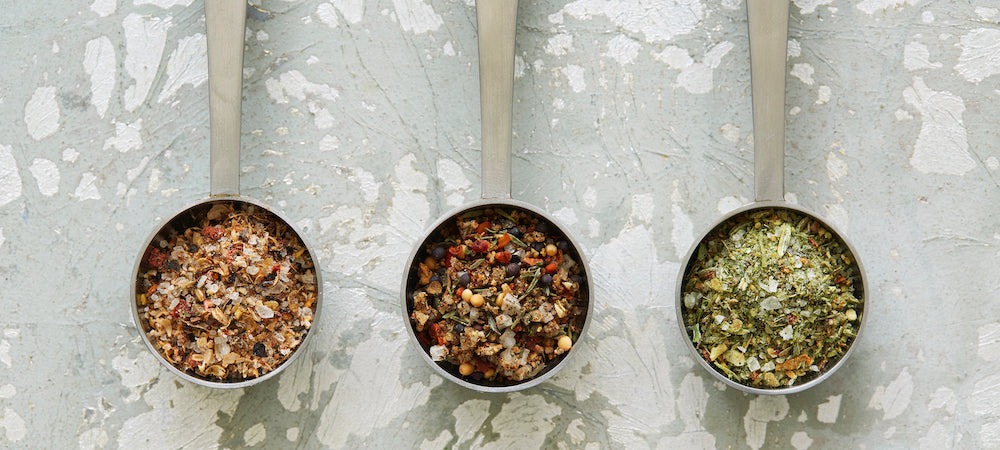
Seasoning Salts for Everything & Anything
These aren’t your average grocery store blends. Our handcrafted Seasoning Salts are made in small batches using ultra-fresh ingredients you can actually pronounce. Plus, like everything at World Spice, they're all filler-free! Think bold flavor, not mystery dust. Svaneti Seasoned Salt This Georgian blend is a shopkeeper's favorite and our go-to for roasted veggies and meat of all kinds. Garlic Salt Packed with nine fresh ingredients and serious flavor cred, it’s what our resident herbalist Aubrey calls “the most herbaceous and bodacious Garlic Salt out there.” Tuscan Rosemary Salt Designed to transport your kitchen to the rustic, Italian countryside. Rosemary brings the charm, while ginger and cinnamon add a delightfully unexpected touch. Osaka Seasoned Salt Perhaps the unsung hero of our collection, this Japanese-inspired blend ticks all the flavor boxes — salty, savory, crunchy, bright. It’s a best friend to noodles, seafood, eggs, and braised leafy greens. Provencal Seasoned Salt Classic French flavors without the intimidation factor. Balanced herbs, aromatics, citrus, and tomato make this all-in-one seasoning a major timesaver — no mise en place required. Voodoo There are two types of people in this world: those who love Voodoo, and those who haven’t tried it yet. It's our best-selling blend for a reason. America's Seasoned Salt This blend is pure Americana — we’re talking the roadside diner with the jukebox at the table, shiny red booths, and a waitress who calls you “honey.” Shop all Seasoning Salts
Learn more
How to Use Sumac
Before lemons became a kitchen staple, there was Sumac. And lately, it's having a moment. Easy Does It: Quick and Foolproof Ways to Enjoy Sumac SPRINKLE it over store-bought or homemade hummus to add the perfect pucker. TOP avocado toast with Sumac and flaky sea salt. Tart Sumac complements the creamy avocado, and the color combination is lovely. Remember — you eat with your eyes first! MIX with thinly sliced cucumbers and red onions, mint leaves, olive oil, salt, and pepper for a fresh Levantine-style summer salad. Tell Me More This deep red spice comes from the dried berries of the Sumac shrub, native to the Middle East and parts of the Mediterranean, and it’s been used for thousands of years to add bright, tangy flavor to everything from grilled meats to rice dishes and dips. Ground Sumac has a flavor that falls somewhere between lemon zest and hibiscus — tart, fruity, and just a little earthy. It’s a dry spice that behaves like acid, making it a clever substitute when you’re out of lemons or don’t want to add extra liquid to a dish. Use it anywhere you’d reach for citrus to brighten things up — no juicer required. If you're in the mood for something sweet ... Try This: Sumac Strawberry Pound Cake
Learn more
Berbere and Tomatoes — Summer's Power Couple
There’s a moment in every summer that gardeners know well: the one where you realize — again — that maybe five tomato plants was a bit ambitious. Our secret weapon? Berbere. This Ethiopian and Eritrean spice blend is traditionally used to season wats — thick, deeply spiced stews of chicken, beef, or lentils. In our kitchens, we’ve found that Berbere is best friends with tomatoes. It shines in chili, tomato sauces, soups, and even sprinkled over fresh tomato salads. So whether you’re a canner, a freezer, or a fresh-everything type, Berbere just might be your secret summer savior. Easy Does It: Quick and Foolproof Ways to Enjoy Berbere MIX a teaspoon into half a cup of ketchup for hot and spicy dipping. SWAP out Berbere for the usual Italian herbs in your next batch of tomato sauce. ADD a tablespoon of Berbere per pound of ground beef, mix well, form into patties, and fire up the grill. Try This: Berbere Sheet Pan Tomatoes Preheat oven to 400°F. Toss 1 pound halved vine tomatoes and 1 cup thinly sliced onion with 2 tablespoons olive oil, 2 teaspoons Berbere, and 1 1/2 teaspoons Pacific Flake Sea Salt. Spread on a parchment-lined sheet pan, cut side up. Roast for 25 minutes until tender and caramelized. Serve warm.
Learn more